
Microsoft Word has been around for decades, and it’s still one of the first programs most writers open when they decide to start a book. It’s familiar, it’s powerful, and almost everyone already has it installed.
But while Word is excellent for drafting a manuscript, it isn’t the best tool for formatting a finished book. If you’re planning to self-publish, you’ll eventually need dedicated book formatting software.
That said, if you want to get words on the page, Word can absolutely handle the job.
In this article, I’ll show you how to set up Microsoft Word for book writing so you can spend less time fighting the software and more time writing your story.
- Pros and cons of using Word.
- Basics for writing using Word
- Advanced features for using Word
- Whether Word is the best book writing tool
The Tool Built for Writing Books
Microsoft Word is a solid option for drafting. It’s widely available, familiar, and gets the job done. But for indie authors, Word has one big drawback: it wasn’t built for books.
When your manuscript is finished, you’ll need to format it for print and ebook. That means either hiring a professional formatter (which can get expensive) or wrestling with separate tools to make sure your book looks professional.
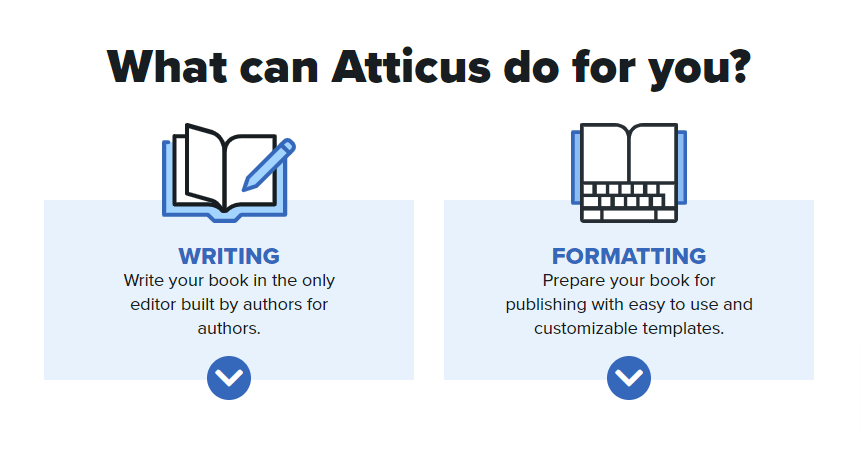
That’s why I created Atticus, an all-in-one platform designed specifically for authors. Atticus combines writing, formatting, simple design tools, collaboration, and progress tracking in a single program.
Best of all, you can preview how your finished book will look while you’re still writing.
And unlike Word, you don’t need extra software later. Atticus lets you export professional-quality ebooks and print-ready files in just a few clicks.
It’s a one-time purchase. No subscriptions. Pay once, and you’ll have lifetime access to the software and all future updates.
If you’d like to see Atticus in action, check out our full article here. But if you’d prefer to stick with Word for now, let’s walk through exactly how to set it up for writing your manuscript.
Pros and Cons of Writing With Word
Over the years, I’ve tested plenty of writing programs built specifically for authors. Compared to those, Microsoft Word still holds its own — but it definitely has strengths and weaknesses worth noting.
Pros
- Widely available. Most computers come with Word pre-installed, or you can access it through Microsoft 365.
- Feature-rich. Word has more customization and formatting options than most basic writing tools.
- Auto-save and backup. If you’re using OneDrive, your work is saved automatically in the cloud.
- Built-in editing tools. Grammar and spelling checks are included, plus more advanced suggestions with the Editor feature.
- Industry standard for collaboration. Editors and agents are used to Track Changes, making Word the default for professional editing.
- Cross-platform support. You can use Word on Windows, Mac, iPad, or even in your browser.
- File compatibility. Word’s DOCX format is universal. Almost every other writing or formatting program can open it.
Cons
- Costly without a subscription. If you don’t already have it, Word can be one of the pricier writing tools.
- Cluttered interface. The sheer number of menus and ribbons can feel distracting compared to simpler, minimalist apps.
- Not built for books. Word can’t export polished ebooks or print-ready files on its own. To properly format your book, you’ll need extra software or formatter.
- Cumbersome with long manuscripts. Very large documents can slow down, making navigation and editing frustrating.
- Subscription lock-in. Newer versions of Word push Microsoft 365 subscriptions, which may feel like overkill if you just want a writing tool.
- Limited goal-tracking. Unlike book-specific apps, Word doesn’t have built-in tools for word count goals, progress charts, or daily writing streaks.
Video: How to Write a Book in Word

Want more videos like this? Be sure to subscribe to our YouTube channel for weekly videos!
Why I'm Qualified to Talk About Microsoft Word
Fair question, After all, advice is only as good as the person giving it.
I’ve been in the publishing industry for more than a decade, helping writers at every stage of their journey. During that time, I’ve tested and taught nearly every writing tool available: Microsoft Word, Scrivener, Google Docs, Atticus, and more. Each has strengths and weaknesses, and I’ve seen firsthand how those differences impact real authors.
Beyond my own use, I’ve also worked directly with hundreds of authors (from first-time novelists to bestselling names) and listened closely to their feedback. Through surveys, coaching, and countless conversations, I’ve built a clear picture of which tools authors rely on most, and where those tools fall short.
And as the founder of Kindlepreneur, a site that reaches hundreds of thousands of writers every month, I’ve had a front-row seat to the publishing world’s challenges and trends. That vantage point has given me a unique perspective on what authors actually need from their writing tools.
That combination of personal experience and community insight is why I feel confident guiding you through Word’s features. I know what actually matters to authors, not just what looks good on a features list.
So with that in mind, let’s take a closer look at how to write a book in Microsoft Word.
The Basics of Book Writing in Word
In my experience, MS Word has a ton of features. This is good because it gives you options, allowing you to choose how best to build your writing experience. But there's such a thing as too many options, and it's easy to get bogged down in them.
Fortunately, I didn't have to dive deep into all of Word's features to begin. In fact, I've found that sticking to the basics works perfectly for me.
For those who crave a simple, uncluttered writing process (like I do), the basics will be more than enough.
Font Size and Style
When you open a new Word document, you'll see a default font style and size on the Home tab. Usually, this is Aptos or Calibri for the style, and 11 for the font size — depending on your version of Word. Times New Roman and 12-point font are the widely accepted standard manuscript format.
If you are querying a literary agent or sending the document to an editor, they may have their submission guidelines, so remember to check.
If you're going to self-publish (and you totally should), then simply choose a font size and style that you like. You'll likely change it during formatting, anyway.
Chapter Headings
You'll want a way to navigate easily through your document when the word count gets high. To do this, use the Styles option on the Home toolbar in Word.
You can highlight your chapter heading or number, which will bring up a toolbar with the Styles option in it. Or you can simply place your cursor in or next to your heading and then select the Styles option from the toolbar near the top of your screen.
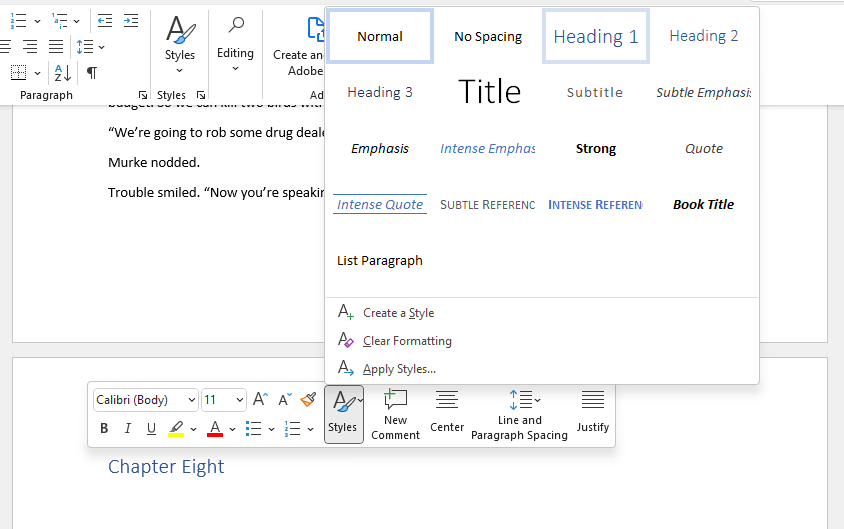
I'd suggest using the Header 1 option for chapter headings. This way, you can use Header 2 for subheadings or scene breaks.
You can also pick “Create a Style” and make your own headings, using a color and font of your choice if you don't like the defaults. But since you'll likely end up changing the chapter styles later anyway, it's not necessary.
Navigation
Once you start using Headings, you'll want to activate the Navigation Pane so you can click around your book easily. When you're working on a long document, this is a massive time-saver.
To do this, click on the View tab from the top toolbar. Just left of center, you'll see an option that says “Navigation Pane.” Simply click the box. If you don't have any headings yet, they'll automatically populate there once you do.
If you don't want to have the Navigation Pane up while you write, simply click it off and click it back on whenever you want to use it!
Protecting Your Document with Passwords
If you’re sharing your manuscript with editors, beta readers, or co-authors, you may want an extra layer of control over how it’s accessed.
Microsoft Word allows you to set a password on your document through the Review tab by selecting Protect Document. From there, you can:
- Require a password to open or edit the file.
- Restrict editing so others can leave comments but not change the text.
- Set the document as “Read Only” so it can be viewed but not altered.
These options aren’t mandatory, but they can give you peace of mind when sending your work to others.
(Just be sure to store your password safely, since forgetting it can lock you out of your own manuscript.)
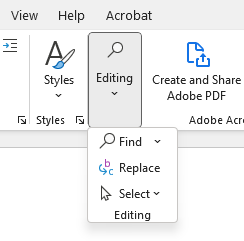
Find and Replace
Using the Find or Find and Replace feature in Microsoft Word can make your life easier when editing or trying to remember what color a certain character's eyes were. (If you’re not using character profiles, that is.)
On the Home toolbar, you'll see the Editing feature next to the Styles feature. Click on this to use the Find or Find and Replace tool, depending on what you need.
Word Count
If you're writing to meet daily goals (which you totally should!), then it's important to know your word count. Luckily, Word makes this easy by automatically displaying the word count at the bottom left corner of the window. (It displays the page number, as well.)
If you want to know how many words are in a certain section, you can highlight that section, and the program will automatically count them and display them in the bottom left corner. Easy!
That's it for the basics! With those four foundational tools, I've been able to craft my book in Word.
But what about those of us who are plotters or those eager to dive into formatting? Or perhaps you're curious about other available features. Keep reading for some more advanced insights!
(If you're writing a book for something like National Novel Writing Month, I'd stick with the basics above. NaNoWriMo is all about getting the words down. You can worry about prettying them up later!)
Advanced Word Book Writing
MS Word is a word processor. It's a powerful one, but it's still mainly a word processor. Now, that doesn't mean you can't do other things with it, like format for submission to a publishing house. You can.
But if you're mainly concerned with formatting your manuscript for submission to traditional publishing channels, check out our in-depth article on manuscript formatting. In it, we cover things like title page creation, margins, and headers and footers.
If you want to know a bit more about Microsoft Word features that can help you write your book, read on!
Page Break
When ending a chapter, it's a good idea to use the Page Break feature instead of hitting enter a bunch of times to get to the next page.
To do this, click on the Insert tab on the top toolbar. On the very left-hand side of the bar, you'll see the Page Break option at the bottom. Just make sure your cursor is beyond the last character at the end of the chapter!

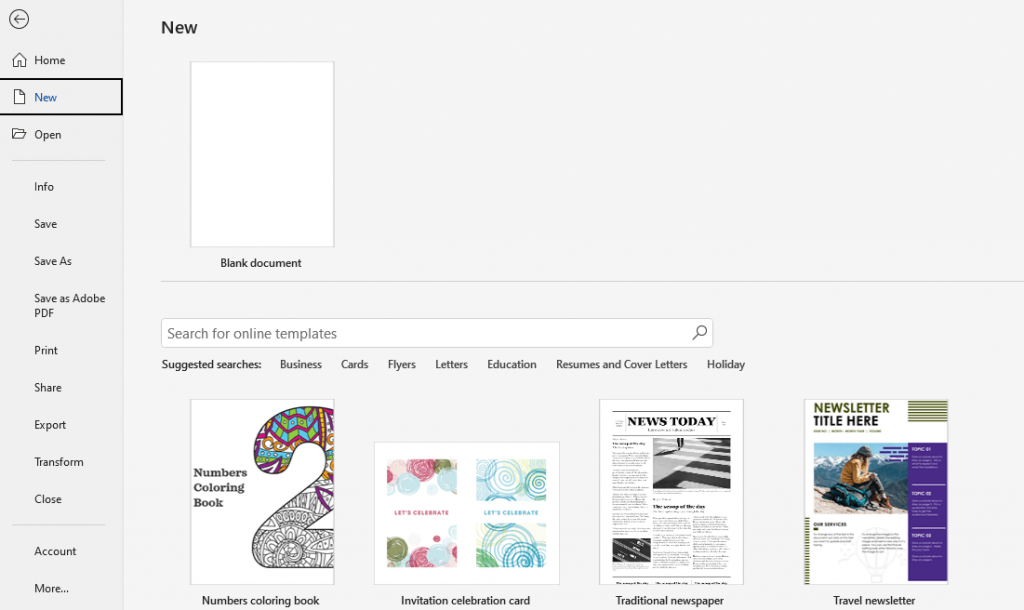
Using a Template
There are plenty of templates you can use with your Microsoft Word document. When you first open the word processor, you'll see some Word templates offered next to the basic Blank Document option. You'll also see a More Templates option so you can search for a specific type of Word template.

Most of these aren’t designed for books. They tend to be geared toward things like resumes, flyers, or reports. If you do find a book template online, you can use it. Just know you’ll almost always need separate book formatting software later if you want a professional result.
Just be aware that your Word document will probably still require you to use a book formatting software if you want a professional-looking book for self-publishing.
The Layout Tab
The default page size in Word is 8.5 by 11 inches. Most books are much smaller than this. So if you want to change your document to reflect the smaller page size, you can do so in the Layout Tab.
This is also the place to change your margins with the Margins tab located in the Page Setup section. You'll also see options to change the paragraph indents and spacing if you want.
Editing Your Word Document
Word has a built-in spelling and grammar checker under the Review tab. It's a good idea to do at least one pass with this. You can also access the Editor directly from the Home tab ribbon in recent versions of Word. It's also worth doing another pass with a proofreading tool like ProWritingAid, Grammarly, or one of the many other options available.

The Review tab has a lot of useful stuff for editing. You can use the Read Aloud feature to help you find awkward sentences or minor mistakes you didn't see on other editing passes. After sending your polished manuscript off to an editor (every writer should hire an editor!) you'll likely use the Review tab to accept or decline changes made to the document.
Should You Use Word for Book Writing?
If you’re planning to self-publish, Microsoft Word can get the job done. It’s widely available, familiar to most people, and perfectly fine for drafting your manuscript. But once you move beyond writing into the formatting and publishing stages, Word starts to show its limits.
That’s why many authors turn to tools built specifically for books.
One example is Atticus, an all-in-one writing and formatting platform I helped develop with an incredible team of authors and engineers. With Atticus, you don’t need to wrestle with margins, page size, or font settings. You just pick a professional template and focus on the words. When you’re ready, you can export a print-ready PDF, a DOCX file, or an EPUB that’s accepted by all major retailers.
Think of it as Word stripped of the clutter you don’t need, plus a set of features designed with authors in mind (things like live formatting previews, templates that fit industry standards, and easy collaboration tools.) The goal is to make the writing, editing, and publishing process smoother from start to finish.
That said, no single tool works for everyone. If Atticus doesn’t sound like the right fit, I’ve also put together a roundup of the best book writing software where you can compare other options and choose what works best for your process.
Final Word on Writing Books Using Word
For shorter projects (like essays, blog posts, or short stories), Microsoft Word is a solid, no-nonsense option. It’s familiar, it’s accessible, and it has all the basics you need to put words on the page.
But when it comes to full-length books, Word shows its limitations.
Large files can get clunky, and you’ll eventually need a separate tool to handle professional formatting. That doesn’t mean you shouldn’t use it (plenty of authors draft entire manuscripts in Word), but it does mean you’ll need to plan for the next step if you want a book that’s ready for publication.
At the end of the day, the best tool is the one that keeps you writing. If Word feels comfortable, use the tips above and start typing. The important part isn’t which program you open, but that you begin the work of writing your book today.


