
You finished your book, which is the hard part.
Well, you've mostly finished it.
Now you’re staring at Amazon’s Kindle Direct Publishing dashboard, trying to figure out what happens next. What to click. What matters. What you can change later. What you really, really don’t want to mess up because you were moving too fast and assumed Amazon would make it obvious.
Publishing a book on Amazon is not difficult in the sense that the steps are impossible to follow. KDP does a decent job walking you through the process. But that doesn’t mean every choice is obvious, or that every field should be handled at the last second while you’re uploading your manuscript and hoping for the best.
There are a few decisions that quietly affect how your book appears, how readers find it, what royalty options you qualify for, and whether your ebook, paperback, hardcover, and series page all behave the way you expect. None of this is meant to scare you. It’s just easier to get right when you know what’s coming.
So in this updated guide, I’ll walk you through the process of publishing a book on Amazon through KDP, from setting up your account to uploading your files, choosing categories and keywords, setting your price, adding print editions, and checking everything once the book goes live.
Let’s get your book published without making future-you angry.
What You Will Need: Publishing Essentials
Before you even open KDP and start clicking around, there are a few things you should already have figured out.
(After all, stopping mid-upload to guess at stuff is how mistakes happen.)
These are the pieces you’ll be filling in as you go, so it helps to have them ready.
1. The Title and Subtitle
At this point, you should know what you’re calling the book. And not just from a creative standpoint. Your title plays a role in how your book gets found on Amazon. That matters more than most people realize.
If you need help, see our articles about how to title a book, and how to choose a subtitle that sells.
2. Your Author Name
Real name, pen name, whatever you’ve chosen (just be consistent).
This is what readers will see, and it’s what Amazon will attach to your books going forward.
If you need inspiration, check out our article about how to choose a good pen name.
3. Your Book Description
Think of your book description more like a miniature sales page rather than a summary.
Most authors treat it like an afterthought, then wonder why their page doesn’t convert. Formatting matters here. Line breaks matter. Emphasis matters.
If you don’t want to mess with HTML yourself, use the free Kindlepreneur Book Description Generator to format it before you paste it into KDP.
And if you need some pointers, we have an article on how to write a fantastic book description.
4. Your Categories
You’ll be able to choose up to three, but choose carefully.
Some categories are easy to rank in. Some are almost impossible. Some categories may appear in research tools or search paths but not function as useful browsable shelves for shoppers. You want categories that fit your book and give real readers a realistic way to find it.
Figure this out before you upload so you’re not guessing. Publisher Rocket will help.
Our in-depth article on selecting Amazon categories will help too.
5. Your Keywords
This is where you tell Amazon what your book should show up for (the actual search phrases people use, not just vague ideas).
Most people rush this part and type in whatever comes to mind. That’s a mistake. Do a little research. Think in phrases. If you want help validating demand and competition, tools like Publisher Rocket exist for a reason.
Our guide on choosing Kindle keywords is a great resource you should read.
6. Your eBook File
You’ll need a clean, valid file. For reflowable ebooks, KDP commonly accepts DOC/DOCX, EPUB, and KPF files. EPUB is a good option if you’re exporting from a formatting tool like Atticus, while KPF is Amazon’s own Kindle Package Format and is designed to work well across Kindle devices and apps.
Our guide on the different eBook file types goes over each if you're unfamiliar with any.
Whatever you use, preview it before uploading. Don’t assume it looks fine.
And if you'd like to make things easier on yourself, use a formatting tool instead of trying to do everything in Google Docs or Microsoft Word. We recommend Atticus, which beyond helping you create amazing eBooks, will also help you format print books.
More on that next.
7. Your Print File
If you’re publishing print versions, I recommend using properly formatted PDFs. KDP accepts some other file types for print interiors, but a print-ready PDF gives you the most control over how the finished book looks. Tools like Atticus make this easier, but the key thing is that your files are truly print-ready.
You can add print editions after your eBook is live, so don’t stress if you’re starting with digital.
8. Your Book Cover
This matters more than most authors want to admit.
KDP has a basic cover creator, but very few books stand out when they use it. Have a real cover file ready. This is the first impression.
If you need pointers, our guide on book covers will help.
9. Your ISBN (Optional)
For print books, you can use your own ISBN or let Amazon assign one. Using your own means you’re listed as the publisher. Some authors care about that. Some don’t.
If you aren't sure, our guides on what an ISBN is and how to get an ISBN will help.
Kindlepreneur also has a free ISBN barcode generator, which is handy.
10. Your Price
Have a general idea before you start. Look at other books in your genre. See what the typical price point is for books in your genre inside Publisher Rocket. Kindlepreneur's free sales calculator can help too.
Think about what you’re trying to do with this release. You can change your price later, but it helps to go in with a plan.
Setting Up Your KDP Account
Okay, first things first…
If you haven’t already, you need a Kindle Direct Publishing account. That’s where all your publishing happens.
Go to kdp.amazon.com and sign in with your regular Amazon login if you already have one. If you don’t, go ahead and create one first. You can make a new Amazon login just for publishing, or use your everyday one (up to you.)
Once you’re in, KDP will ask you to fill a few things out before you can publish:
Complete your profile info
This is your name, address, and phone number. Nothing fancy, just the basics so Amazon knows who you are.
Set up payments
You’ll be asked for your bank account and routing number (or whatever the equivalent is where you live) so Amazon can send you royalties.
Handle your tax info
You’ll need to enter tax info that applies to your situation. In the U.S. that’s your Social Security number or EIN. If you’re outside the U.S., you’ll enter your local tax info so Amazon doesn’t hold back extra withholding.
Here’s the thing about this part: if you skip any of it, Amazon will remind you later when you try to publish. And honestly, it’s just easier to get it squared away first than to stop midway through an upload.
Once all that’s done, you’ll land on the KDP dashboard (your Bookshelf) and that’s where the real fun begins.
Starting Your First Book in KDP
Once your account is set up, you’ll land on your KDP dashboard. This is your home base. It’s where all your books live, and where you’ll start every new upload.

To add a new book, click Create and you’ll see a few options:
• Kindle eBook
• Paperback
• Hardcover
For this guide, we’re going to start with the Kindle eBook option.
We’re starting with the ebook because it’s the most straightforward version to upload. And once your ebook is live, you can add a paperback or hardcover version right from your dashboard. The steps are almost identical.
So if your plan is to publish in multiple formats, don’t worry. You’re not locking yourself into anything here.
You’re just starting with the easiest version first.
Once you click Create Kindle eBook, Amazon will take you through three main pages:
- Kindle eBook Details
- Kindle eBook Content
- Kindle eBook Pricing
We’ll walk through each of those next.
Step 1: Kindle eBook Details
This is the first real screen where Amazon starts building your book’s page.
Everything you enter here becomes public-facing in some way, and a lot of it influences how your book gets found. So don’t rush through it.
Let’s go top to bottom.
Language

Pick the language your book is written in. Simple.
Book Title and Subtitle
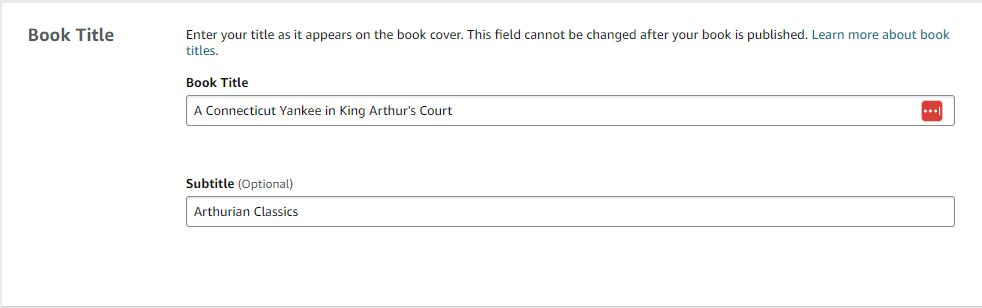
Enter your exact title and subtitle here.
No experimenting. No “I’ll change this later.” This is what readers will see, and it’s what Amazon indexes. Some book details can be hard or impossible to change after publishing, especially for print editions, so make sure your title and subtitle are correct before you submit.
Series (if applicable)

If this book is part of a series, this is where you link it. You’ll enter the series name and the book’s number in that series.
If it’s a standalone, skip this.
Edition Number

This is only for new versions of an already-published book. If this is your first time publishing it, leave this alone.
Author

Enter your author name or pen name exactly how you want it to appear on Amazon.
Contributors
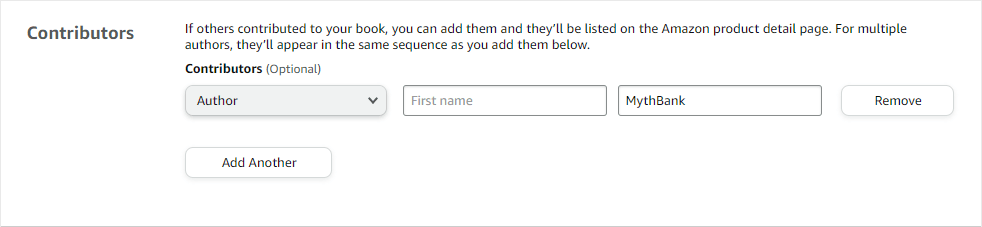
This is where you can credit editors, illustrators, translators, and co-authors.
Most people can skip this unless it’s truly relevant to your book.
Description
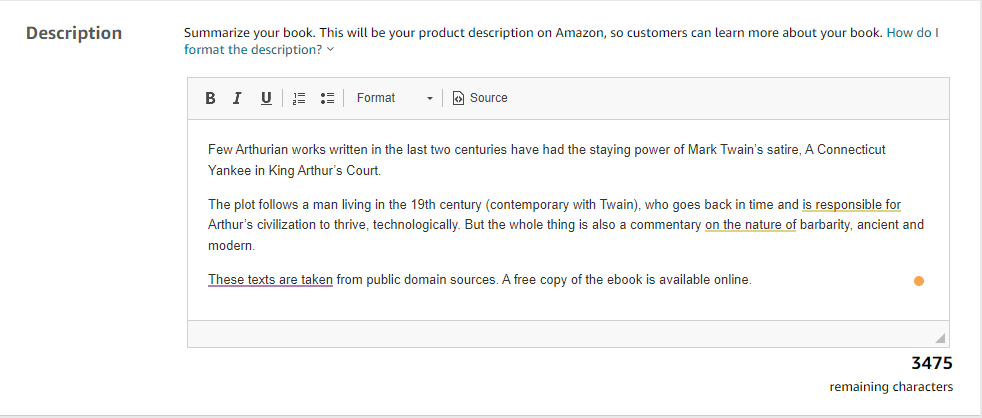
This is one of the most important fields on the entire page.
This is your pitch.
People skim. They don’t read. Formatting matters. Big blocks of text get ignored.
KDP uses basic HTML here, which means you can add line breaks, bolding, italics, and lists.
If you don’t want to touch HTML, use the free Kindlepreneur Book Description Generator. It lets you format everything visually and then paste the code in.
Publishing Rights

If you wrote the book, you own the rights. Select that option.
Public domain only applies if the work is genuinely in the public domain.
Categories

You’ll be able to choose up to three categories for your book.
At this stage, the goal isn’t to explore or experiment. You should already know which categories you’re using and why. This is about applying the decision you made earlier, not making it on the fly.
Pick categories that fit your book and give it a realistic shot at visibility. Then move on.
Keywords
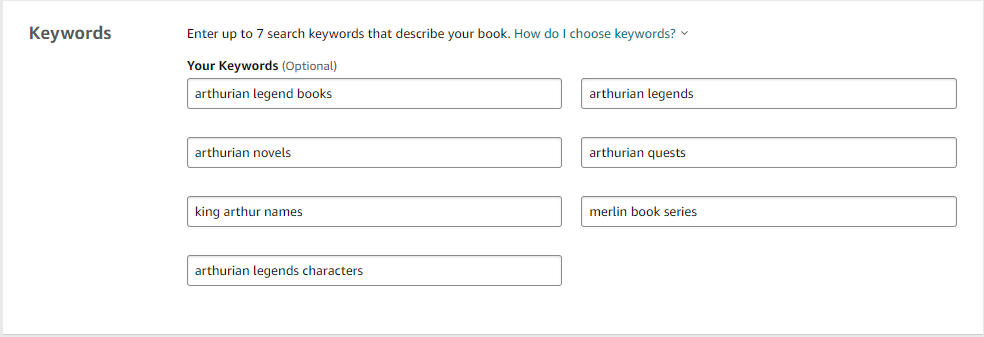
You get seven keyword slots to tell Amazon what your book should appear for in search results.
These work best when you think in phrases, not single words. Focus on how real readers search when they’re looking to buy a book like yours.
Be sure to take time to research what people are actually typing into Amazon, and choose keywords that match both your book and reader intent. Guessing here usually leads to missed visibility.
Age and Grade Range
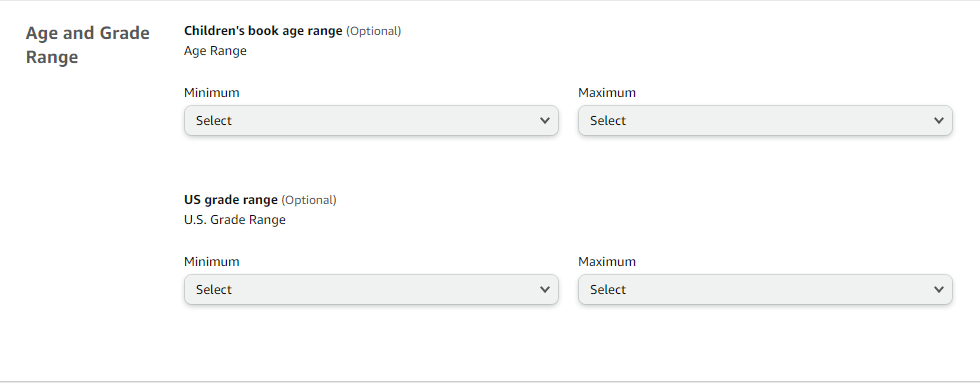
This is mostly for when you're publishing children’s books. If it doesn’t apply to you, skip it.
Pre-order

This is where you decide whether your book goes live as soon as it’s approved or on a future date.
If you choose pre-order, readers can buy your Kindle ebook before release. KDP currently lets you schedule Kindle ebook pre-orders up to one year in advance, and the release date is based on GMT. If you see Amazon’s separate “Schedule a Release” option, that works differently: the book’s detail page stays hidden until release, and the release date can be set up to 90 days in advance.
Choose the option that fits your launch plan.
Once you’ve filled everything out, hit Save and Continue.
Now we move on to the next page.
Step 2: Kindle Ebook Content
This is the part where you upload the actual pieces of the book.
There are a few decisions here, but most of them are more straightforward than they look.
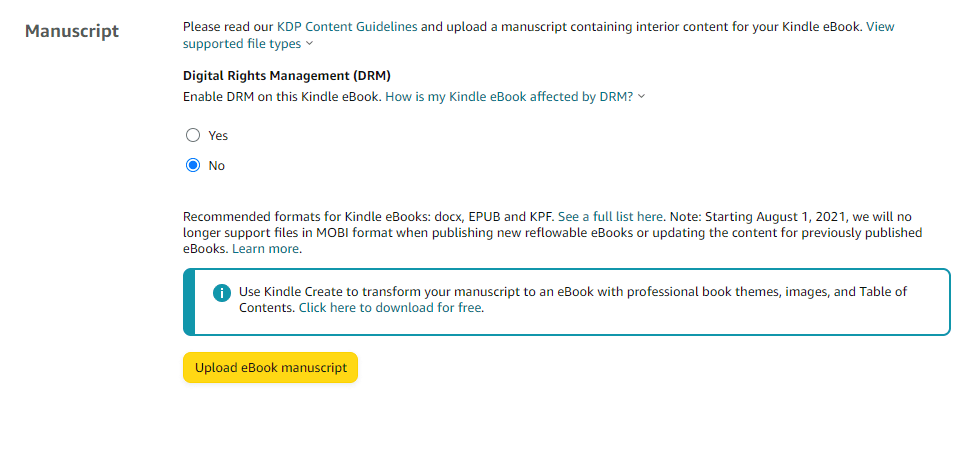
Digital Rights Management (DRM)
You’ll be asked whether you want to enable DRM.
DRM is meant to limit copying and sharing of your ebook. There are reasonable arguments on both sides, and this isn’t a one-size-fits-all decision.
Amazon has made recent changes to how Kindle files are handled, so DRM is worth understanding before you make the choice. Some authors enable it to limit casual copying and sharing. Others leave it off because DRM can create friction for certain reader workflows. This is not a one-size-fits-all decision, so make sure you know what you’re choosing before you publish. Our article on Amazon's DRM changes goes into more detail, so check it out if you'd like to learn more about Digital Rights Management.
One important note: You can change your DRM selection for future uploads in KDP, but not for a version that’s already live.
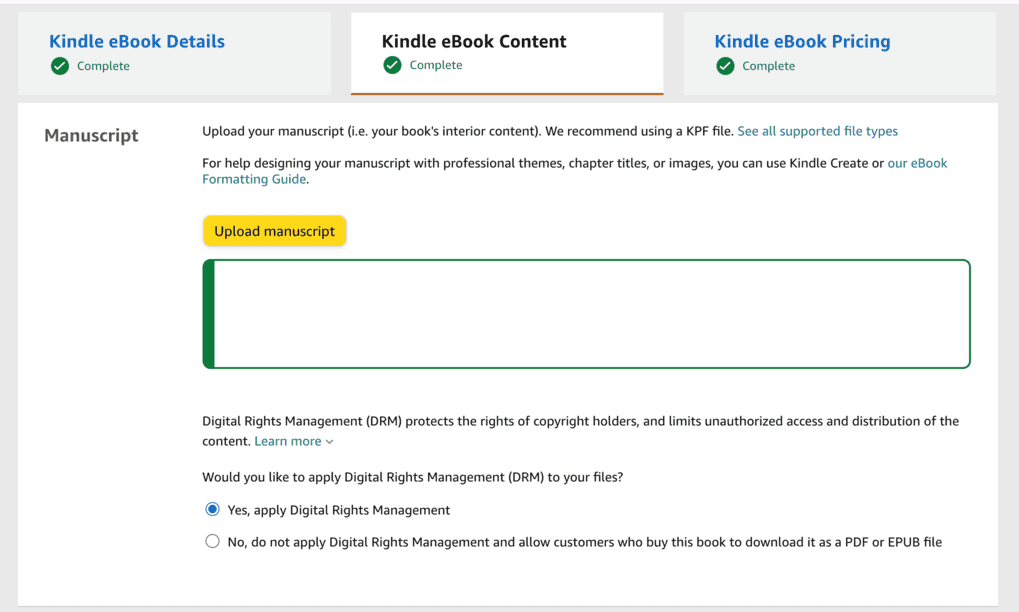
Upload Your Manuscript
This is where you upload your eBook file.
For reflowable ebooks, KDP commonly accepts DOC/DOCX, EPUB, and KPF files. Use the format that makes the most sense for how you created and formatted your book, as long as the file is clean, valid, and properly previewed before publishing.
Once the file uploads, Amazon will process it. If there are errors, you’ll see warnings here. Don’t ignore them.
Kindle eBook Cover

Next, you’ll choose how your cover is added.
You can either use KDP’s built-in Cover Creator or upload your own cover file.
The Cover Creator works, but it’s limited. Most authors who care about how their book looks upload a professionally designed cover instead. If you have one, this is where it goes.
Launch Previewer

Before moving on, open the KDP online previewer.
This lets you see what your book looks like on different Kindle devices and in the Kindle app. Scroll through it. Click around. Look for formatting issues.
This is your last easy chance to catch problems before readers do.
ISBN
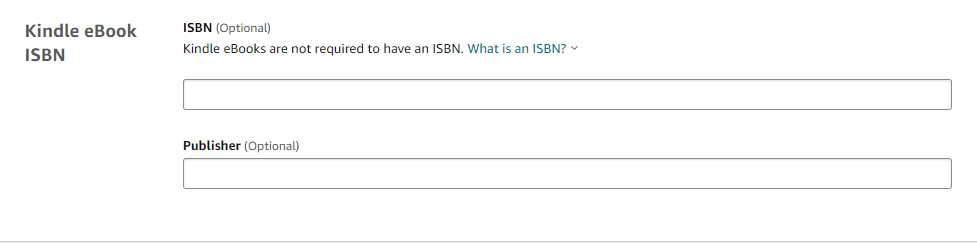
You’ll see an ISBN field here.
ISBNs are not required for Kindle ebooks, so you can leave this blank.
(ISBNs do matter for most print books. Each format needs its own ISBN, so a paperback and hardcover cannot share the same one.)
Once everything looks good, click Save and Continue to move on to pricing.
Step 3: Kindle eBook Pricing
This is the final page before your book goes live.
You’re not uploading files here. You’re making distribution and pricing decisions.
KDP Select

First, you’ll see the option to enroll in KDP Select.
This determines whether your Kindle ebook is exclusive to Amazon for a 90-day KDP Select enrollment period. Enrolling automatically includes the ebook in Kindle Unlimited and makes it eligible for tools like Free Book Promotions and Kindle Countdown Deals. The trade-off is that you can’t sell or distribute the ebook anywhere else during that period.
Some authors use it. Some don’t. It depends on your goals. If you'd like to learn some of the pros and cons, check out Dave's breakdown article on it.
Make sure you understand what you’re agreeing to before checking the box.
Territories

Next, you’ll choose where Amazon has the right to sell your book.
Most authors select worldwide rights. If you have a specific reason not to, you’ll know it.
Pricing and Royalties
Now you’ll set your price and choose your royalty option.
This isn’t something to rush. Look at other books in your genre. Pay attention to what readers expect to pay. Amazon will also show you how different price points affect your royalty. For Amazon.com, the 70% ebook royalty option currently requires a list price between $2.99 and $9.99. Prices outside that range generally use the 35% option, and other marketplaces have their own price requirements.
There’s no perfect number here. You’re making a judgment call based on your goals for the book.
If you see a warning about missing account information at any point, stop and fix it. Amazon won’t let you publish until everything is complete.
Once you’re satisfied, click Publish (or Submit for Pre-order, if that’s what you chose earlier).
After You Publish
Once you submit your book, Amazon takes it from there.
Your eBook will go into review. This usually takes up to 72 hours, though it’s often faster.
You’ll get an email when your book is live. Just know that some parts of the Amazon listing can take longer to fully settle in. Your book may take up to 72 hours to appear in search results, the Read Sample can take several business days, and linked print/ebook formats may take several days to show together.
When that happens, go to your book’s Amazon page and look it over. Check the description. Click the preview. Make sure everything looks the way you expected.
If something’s off, fix it now while you’re still close to the process.
Once everything looks right, you’re done. Your book is live.
Adding Paperback and Hardcover Editions
Once your ebook is live, you can add print editions right from your KDP dashboard.
Instead of starting from scratch, you start from the book you already uploaded.
On your Bookshelf, you’ll see options to create a Paperback or Hardcover version next to your eBook. Click one and KDP will walk you through a familiar process.
Most of the details are already filled in, which makes this part easier than the first upload.
There are a few things that are specific to print:
Print Files
Print books use different files than eBooks.
For best results, use a print-ready interior PDF and a cover file built specifically for print. KDP can accept some other interior file types, but PDF gives you the cleanest control over the final printed layout. Print covers are full wraps — front, spine, and back — sized to match your trim size and page count.
These files are usually created by formatting software or a designer, not by exporting your ebook.
If you’re not sure whether a file is print-ready, stop and double-check. This is one of the most common places authors run into issues.
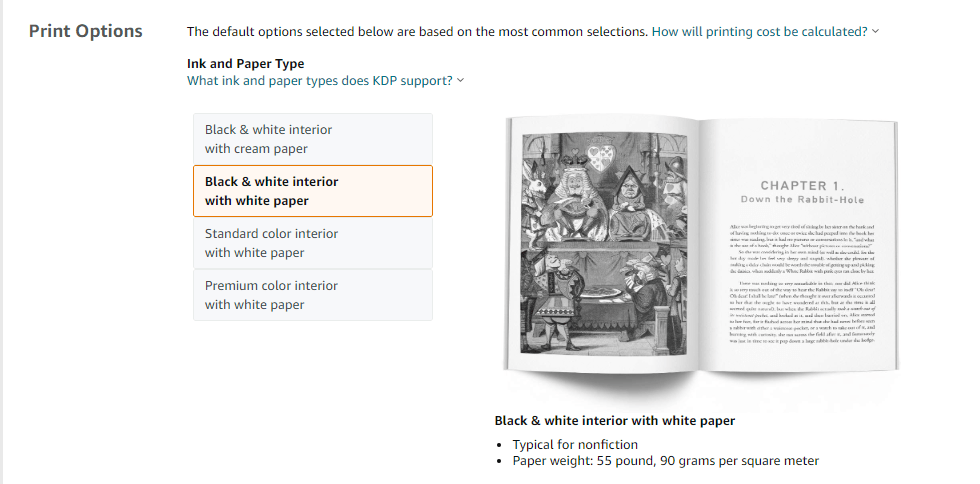
Trim Size, Bleed, and Paper Settings

This is where you choose the physical details of the book.
Trim size is the finished size of the book in a reader’s hands. Bleed refers to whether any text or images extend all the way to the edge of the page. Paper type affects thickness and color.
If those terms are new to you, don’t panic. KDP provides explanations for each option, and most books use standard settings. The important thing is to make sure these choices match how your interior and cover files were created.
When in doubt, stop and double-check before moving on.
Proofing Matters
Use the print previewer carefully. Look for page breaks, margins, and any odd spacing. This is also where ordering a physical proof can make sense before publishing.
The rest of the flow (pricing, territories, and publishing) will feel familiar.
Once approved, your paperback or hardcover should link to the same Amazon product page as your eBook, as long as the book details match across formats. This is usually automatic, but KDP says format linking can take 48 hours to 1 week after each edition is live.
Setting Up a Series Page
If your book is part of a series, KDP lets you group those books together on a dedicated series page.
This is optional, and it’s not something you need to do right away (especially if you’re publishing your first book). It becomes more useful once you have more than one book available.
When you create a series, there are a few fields you’ll see:
Series Title

This is the name of the series as readers will see it on Amazon. Keep it consistent with how you reference the series elsewhere. Changing it later can cause confusion.
Reading Order
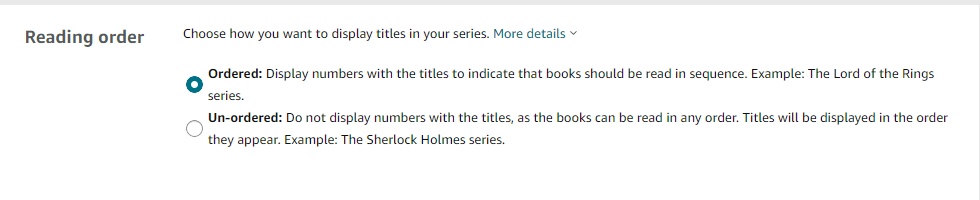
You’ll assign each book its place in the series. This helps Amazon display the books correctly and helps readers know where to start.
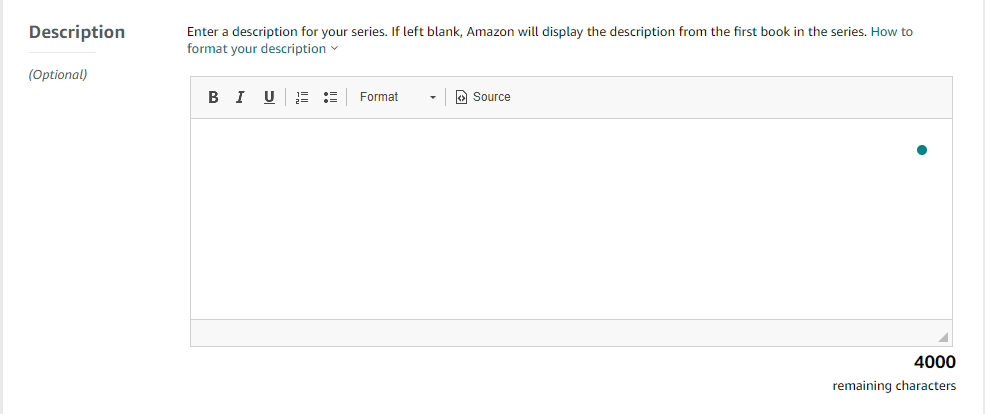
Series Description
This is a short explanation of what the series is about. It doesn’t need to be long or clever. Its job is to give readers context when they land on the series page.
Series Image

You can upload an image for the series page. Many authors use a variation of the cover design or a simple branded graphic. This is optional and not something you need to overthink.
You can create or manage a series from your KDP dashboard at any time. You don’t need every book published to set one up, and you can add or remove books later. Just note that public domain and low-content books are not eligible for KDP series pages.
If you’re publishing a standalone book or your first book in what might become a series, it’s perfectly fine to skip this for now.
Video: How to Upload a Book to Amazon
For a nice summary of this article, along with a few personal thoughts on the subject, be sure to check out this video on how to format upload your book to Amazon.
Want more videos like this? Be sure to subscribe to my YouTube channel for weekly videos!
Now You’re Ready to Publish
At this point, you know how the process works.
You know what to prepare, where to click, what to slow down for, and what not to overthink. That alone puts you ahead of most first-time authors.
Once your book is live and everything looks right, the next step is figuring out how you want people to find it. That’s where marketing comes in, and it’s a separate conversation entirely.
When you’re ready to think about what comes after publishing, Authorpreneur Academy is one option worth looking at.

It’s built for authors who want a clearer path — not just for getting a book live, but for understanding how crafting, publishing, and marketing a book fit together. It walks through the process in order, focuses on what matters most at each stage, and helps you avoid the detours that tend to slow people down.
Some authors like figuring things out one piece at a time. Others prefer fewer open questions and a more complete picture.
If you’re in that second camp, having a structured framework can make the publishing side of things feel a lot less uncertain (especially after you’ve just gone through your first KDP upload).


